Development teams in most IT businesses employ developer mode to enable USB debugging and move valuable data from an Android device to a computer.
Although this capability is valuable, most IT professionals advise you to turn off your device because it is less secure when linked to a PC.
In this tutorial, we’ll learn how to access developer mode on Android and enable USB debugging.
What is USB debugging mode on Android?
USB debugging involves testing apps to find defects or bugs in the implemented applications or software. Generally, when you run the app, it will run as a virtual mobile device on your PC.
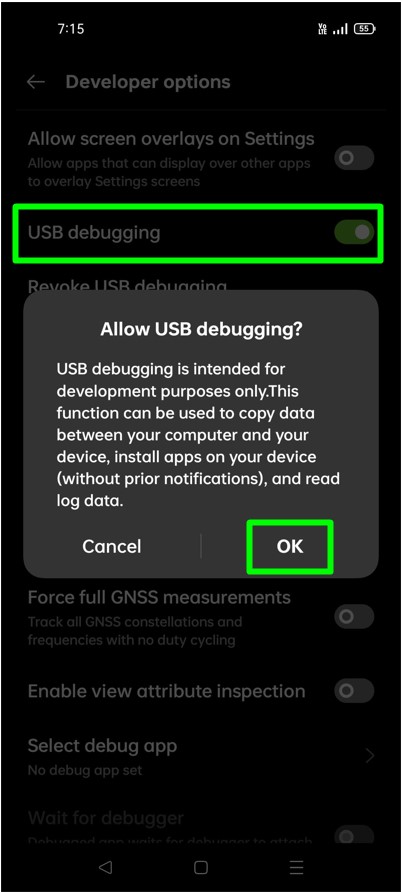
If you want to run your app on your mobile and test it on a real device rather than a virtual device, you need to connect your phone via USB and enable USB Debugging underneath developer options in Android. Enabling developer mode will let you debug your mobile apps every time you run the app.
Why do We Use USB debugging?
Developer mode enables USB debugging primarily to facilitate a connection between Android devices and a computer with the Android Software Development Kit (SDK).
Using USB debugging mode, the user can control the connected device from a computer. You can also open the Linux system console of your Android computer and work there.
How Do I Enable Developer Mode to Enable USB Debugging on Android?
Follow these easy steps to Access Developer Mode to Enable USB Debugging on Android devices-
1. Go to the mobile settings on your Android device.
2. Now, you need to find the About Phone option and click on it.
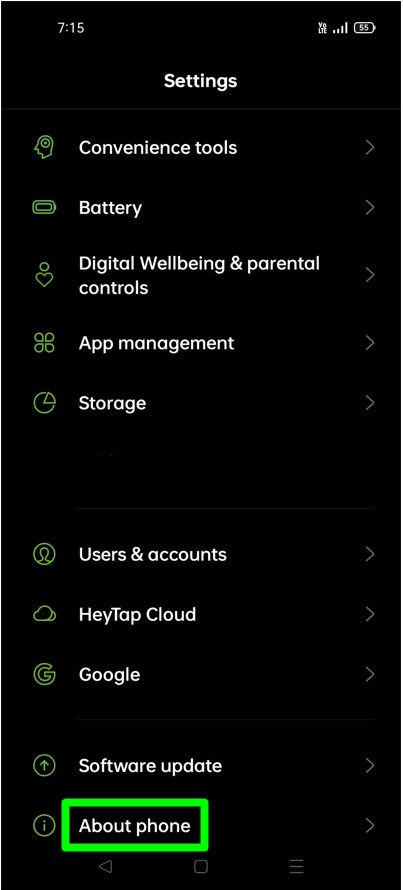
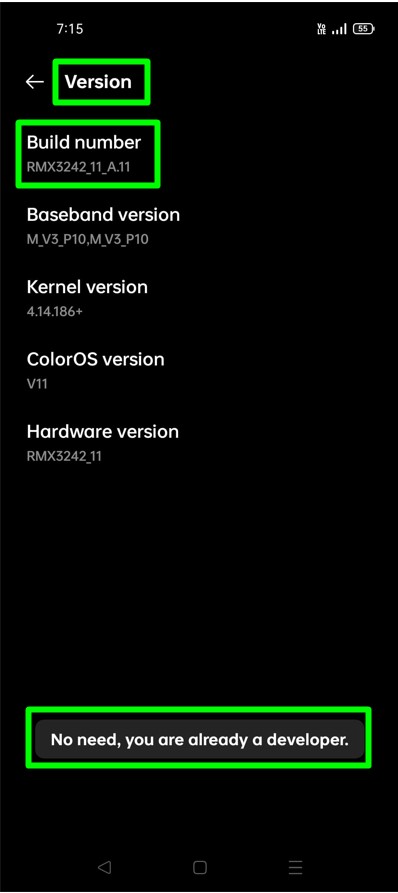
3. Here, you need to click on a version or a build number more than five times until a popup with the message “You are now a developer” appears.
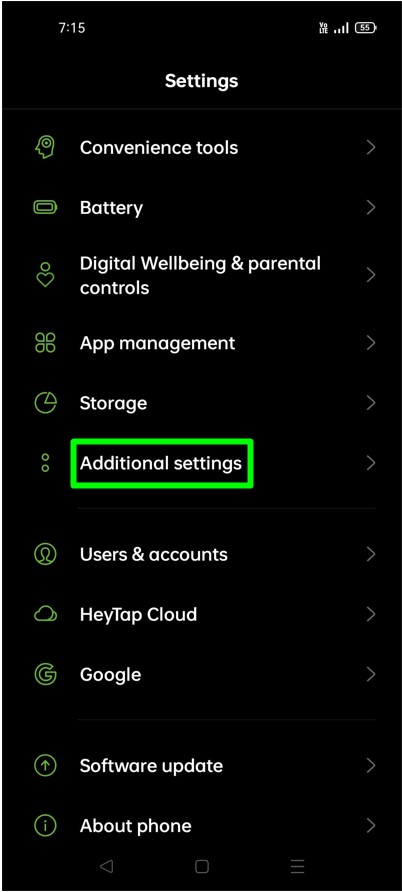
4. Again, go to mobile settings, find the Additional Settings option, and tap on it.
5. Now, please search for the Developer Option and tap on it.
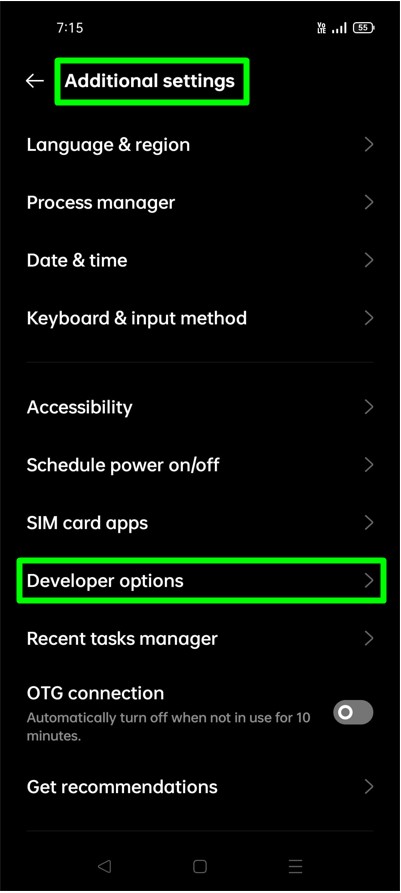
6. You need to scroll down to find the DEBUGGING section.
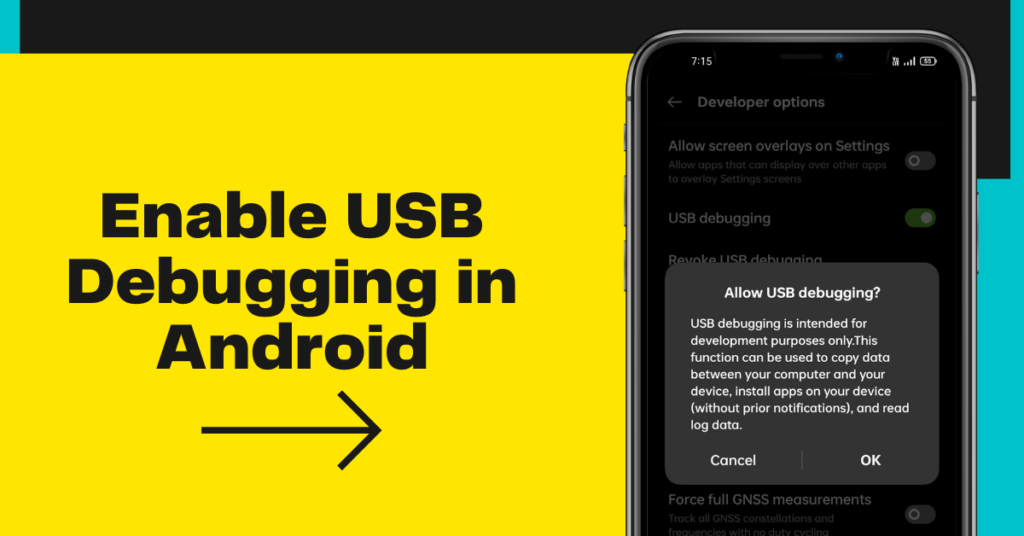
7. You will see USB debugging in the DEBUGGING section. Tap on the button to enable USB debugging on your Android. That’s it.
Final Thoughts About How to Access Developer Mode for USB Debugging in Android
Enabling developer mode and USB debugging on an Android device is a simple process that can offer users greater control over their devices and improve their experience with app development and debugging. Following the steps outlined in this guide, users can easily access developer options on their devices and enable USB debugging to facilitate interaction between their devices and development tools. This functionality can be handy for app developers, tech enthusiasts, and users who seek to customize and optimize their Android experience.
Frequently Asked Questions
Question 1: How do you open developer mode in Android?
Answer: To open developer mode on an Android mobile, go to your Android Settings and then scroll down to the About phone option. Look for the Build number and tap on it continuously (usually seven times) until you prompt with a message saying, “You are now a developer.” Developer options will then be available in your device’s Settings.
Question 2: Is it safe to enable developer mode in Android?
Answer: Enabling developer mode on an Android device is generally safe as it poses no significant security risks. However, it does give you access to advanced settings and options that could potentially harm your device if not used carefully. Developer options should be used only if you know what you are doing and have a specific reason for accessing them.
Question 3: How do I enable developer mode on Android 14?
Answer: Android 14 has not been released, and no information on enabling developer mode specifically for this version is available. The method mentioned in answer one should work for most versions of Android. Still, it’s best to refer to the specific instructions provided by the manufacturer or official Android documentation for Android 14 when it becomes available.
Share

